Français
 English
 Español
In this handy guide, we'll take a look at the different hosting options for your Minecraft server, highlighting their respective advantages and disadvantages. Whether you opt for local hosting, cloud hosting or a specialized Minecraft service, we'll guide you through the essential steps involved in choosing the solution that best suits your needs. By examining factors such as performance, technical support, ease of use, customization, security and cost, you'll be able to make an informed decision and get on with the adventure.
I. The different options for hosting your Minecraft server
In this chapter, we'll look in detail at the three main hosting options for a Minecraft server:
- Local hosting
- Cloud hosting
- Specialized hosting
For each of these solutions, we'll highlight their respective advantages and disadvantages, enabling you to start making an informed comparison and get closer to the choice that best suits your needs.
1) Local Accommodation
Hosting your Minecraft server locally means installing and running the server directly on your own computer or home network. This method offers total control over the server environment, as well as the satisfaction of managing your own resources. However, it also implies the responsibility of keeping the computer on at all times, managing server security and maintenance, and having a high-speed Internet connection and a high-performance computer to play on in good conditions.
Benefits :
- Complete control over server configuration and settings
- No external hosting costs, apart from initial hardware investment costs
- Possibility of extensive server customization and optimization
Disadvantages :
- Need to keep your computer switched on and connected at all times
- Performance limited by your computer's processing power, RAM and network throughput
- Responsibility for server security and maintenance
- Less suitable for users without a high-speed Internet connection
Considering these advantages and disadvantages, local hosting may be an appropriate option for players who want to manage their Minecraft server themselves, and who have high-performance hardware and a broadband Internet connection.
2) Cloud hosting
Cloud hosting involves renting server resources (processor, memory and storage) from a provider, giving you the flexibility to allocate server resources, scalability to adapt resources to your needs, and easy access to the server from anywhere at any time. However, this solution also implies recurring hosting costs, performance dependent on the quality and reliability of the cloud provider, and a certain knowledge of the configurations of this type of service.
Benefits :
- Flexibility in server resource allocation
- Scalability to adjust resources as needed
- Easy access to the server from anywhere, at any time
- Low maintenance and responsibility for security delegated (in part) to the cloud provider
Disadvantages :
- Recurring hosting costs
- Performance dependent on quality and reliability of cloud provider
- Requires knowledge of cloud server configurations
- Possibility of restrictions or limitations imposed by cloud provider
Cloud hosting can be a suitable option for players wishing to benefit from increased scalability and accessibility. However, it's important to choose your cloud provider carefully, and to assess the costs associated with this solution.
3) Specialized accommodation
Specialized hosting services for Minecraft are dedicated solutions generally offering simplified installation and configuration, as well as support focused on the proposed game. These services, designed specifically for Minecraft, are optimized to deliver top-quality performance and gaming experience.
Benefits :
- Easy installation and configuration
- Optimized for Minecraft and high performance
- Game-oriented support and assistance
- Provider-led maintenance
Disadvantages :
- Recurring hosting costs
- (Possibly) Less control over server configuration
Specialized hosting services for Minecraft can be an interesting option for players looking for a turnkey solution, offering optimized performance and dedicated Minecraft support, without worrying about server configuration and maintenance, which can be difficult tasks for people uninitiated in Minecraft server management.
II. Preparing and defining your needs
Before you embark on hosting your Minecraft server, there are several essential preparations to consider. Here are three crucial aspects not to be overlooked:
1) Choice of version
It's important to understand the difference between the two main versions of Minecraft: Java and Bedrock.
Modded or plugin-based servers generally require the Java version (compatible with Windows, MacOS & Linux), while the Bedrock version is more suited to unmodded servers and offers cross-platform compatibility (Windows, Nintendo Switch, Xbox, Playstation, etc.). Take the time to assess your needs and the features you want for your server before making an informed choice.
Please note, however, that it is possible (with some configuration) to make a server with the Java version accessible from other platforms, notably through the use of plugins such as GeyserMC.
A more detailed comparison of the two versions can be found on the official Minecraft website.
2) Performance
The performance of your Minecraft server depends on a number of factors, such as the type of server (modded, with plugins), the number of players and the version of Minecraft.
It's crucial to assess your needs in terms of server resources (processor, RAM, storage) to ensure a smooth and enjoyable gaming experience. Don't forget to take into account the specific requirements of any mods and plugins you want to install, and don't hesitate to adjust your server settings accordingly. Proper performance planning and optimization will help you maintain a stable, responsive server throughout your gaming sessions.
If you're just starting out and don't know how to estimate the requirements for your Minecraft server, you can use this Minecraft resource calculator to get an initial overview of the resources needed to run your Minecraft server.
III. Server setup
Once you've made your choice according to your needs, thanks to the elements outlined above, we'll now take a look at how to set up a Minecraft server.
As Cloud hosting requires technical skills to set it up, we won't cover the subject in this guide, which is intended to be as straightforward as possible. So let's explore the two simplest solutions available to you: locally hosted Minecraft servers and specialized Minecraft server hosting.
1) Locally hosted Minecraft server
In order to host your Minecraft server locally, your computer must meet certain requirements:
- Install a Java version compatible with the desired Minecraft version:
The Java version required depends on the version of Minecraft you wish to run. Minecraft 1.16 and earlier versions require Java 8 or higher, 1.17 requires Java 16, and versions 1.18 and later require Java 17 or higher.
You can download Java from the official Oracle website. - Make sure your computer has sufficient resources to run your Minecraft server.
1.1) Downloading and preparing the environment
First of all, you'll need to download the file needed to launch the Minecraft server, available at https://www.minecraft.net/fr-fr/download/server.
To make it easier to find your way around, we recommend creating a specific folder dedicated to your Minecraft server. We'll call it myserver in this example, and it's located at the following path: C:\monserveur.
Once the folder has been created, simply move the previously downloaded .jar file to the root of the folder you've just created and rename it server.jar.
You should get a result similar to this one:

1.2) Launching the Minecraft server
To run your Minecraft server, you'll need to open a command prompt (via the Windows+R shortcut and type cmd, if you're running Windows). We'll then go to the previously created folder via our command prompt, executing the following command:
cd C:\monserveur
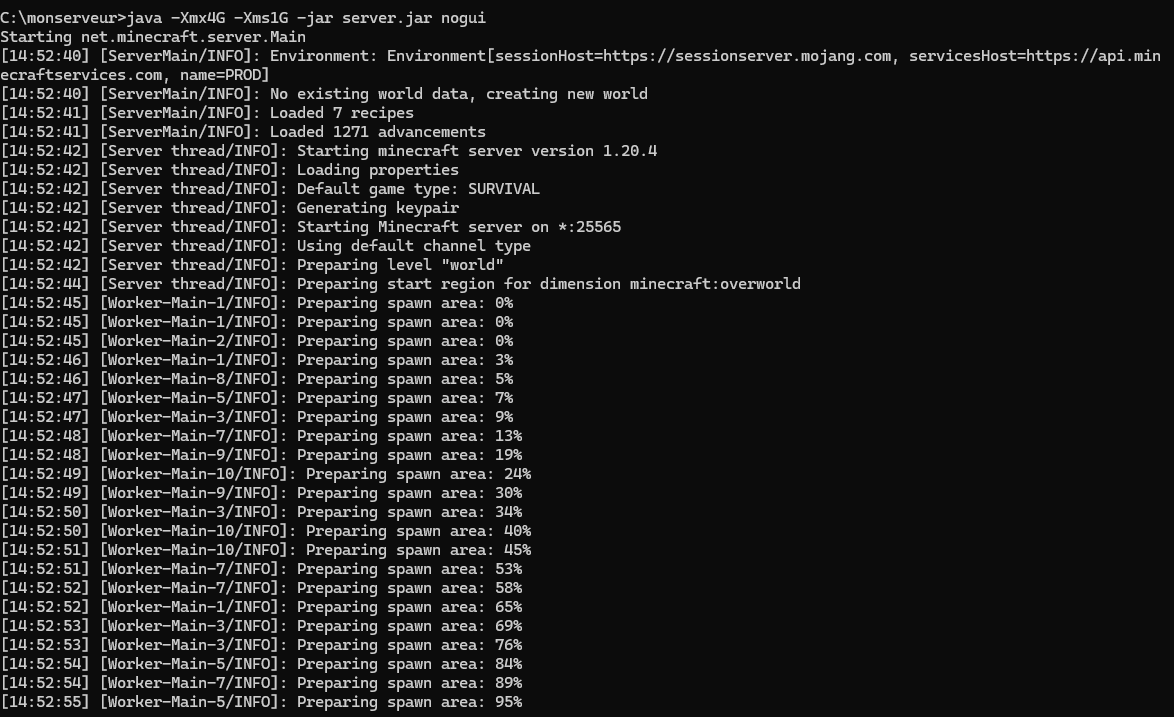
Finally, we'll run the following command to start the server, making sure to replace the two hashtags (##) with the value of the RAM needed to run your server properly (normally evaluated in part II. of this guide):
java -Xmx##G -Xms1G -jar server.jar nogui
On first run, you'll notice a number of files appearing in your folder, including one named eula.txt. In order for your server to run, you need to modify this file so that its content is equal to the following: eula=true.

Once this modification has been made, you should be able to restart your Minecraft server via the previously executed java command.
You should now be able to connect to your Minecraft server using the following connection address: 127.0.0.1:25565.
IMPORTANT: Please note that your Minecraft server is accessible as long as the terminal window remains open. If you close it, your server will cease to function.
2) Specialized Minecraft server hosting
We'll now explore the Minecraft server hosting options offered by Hosterfy, including a range of standard to extreme offerings to perfectly suit your needs.
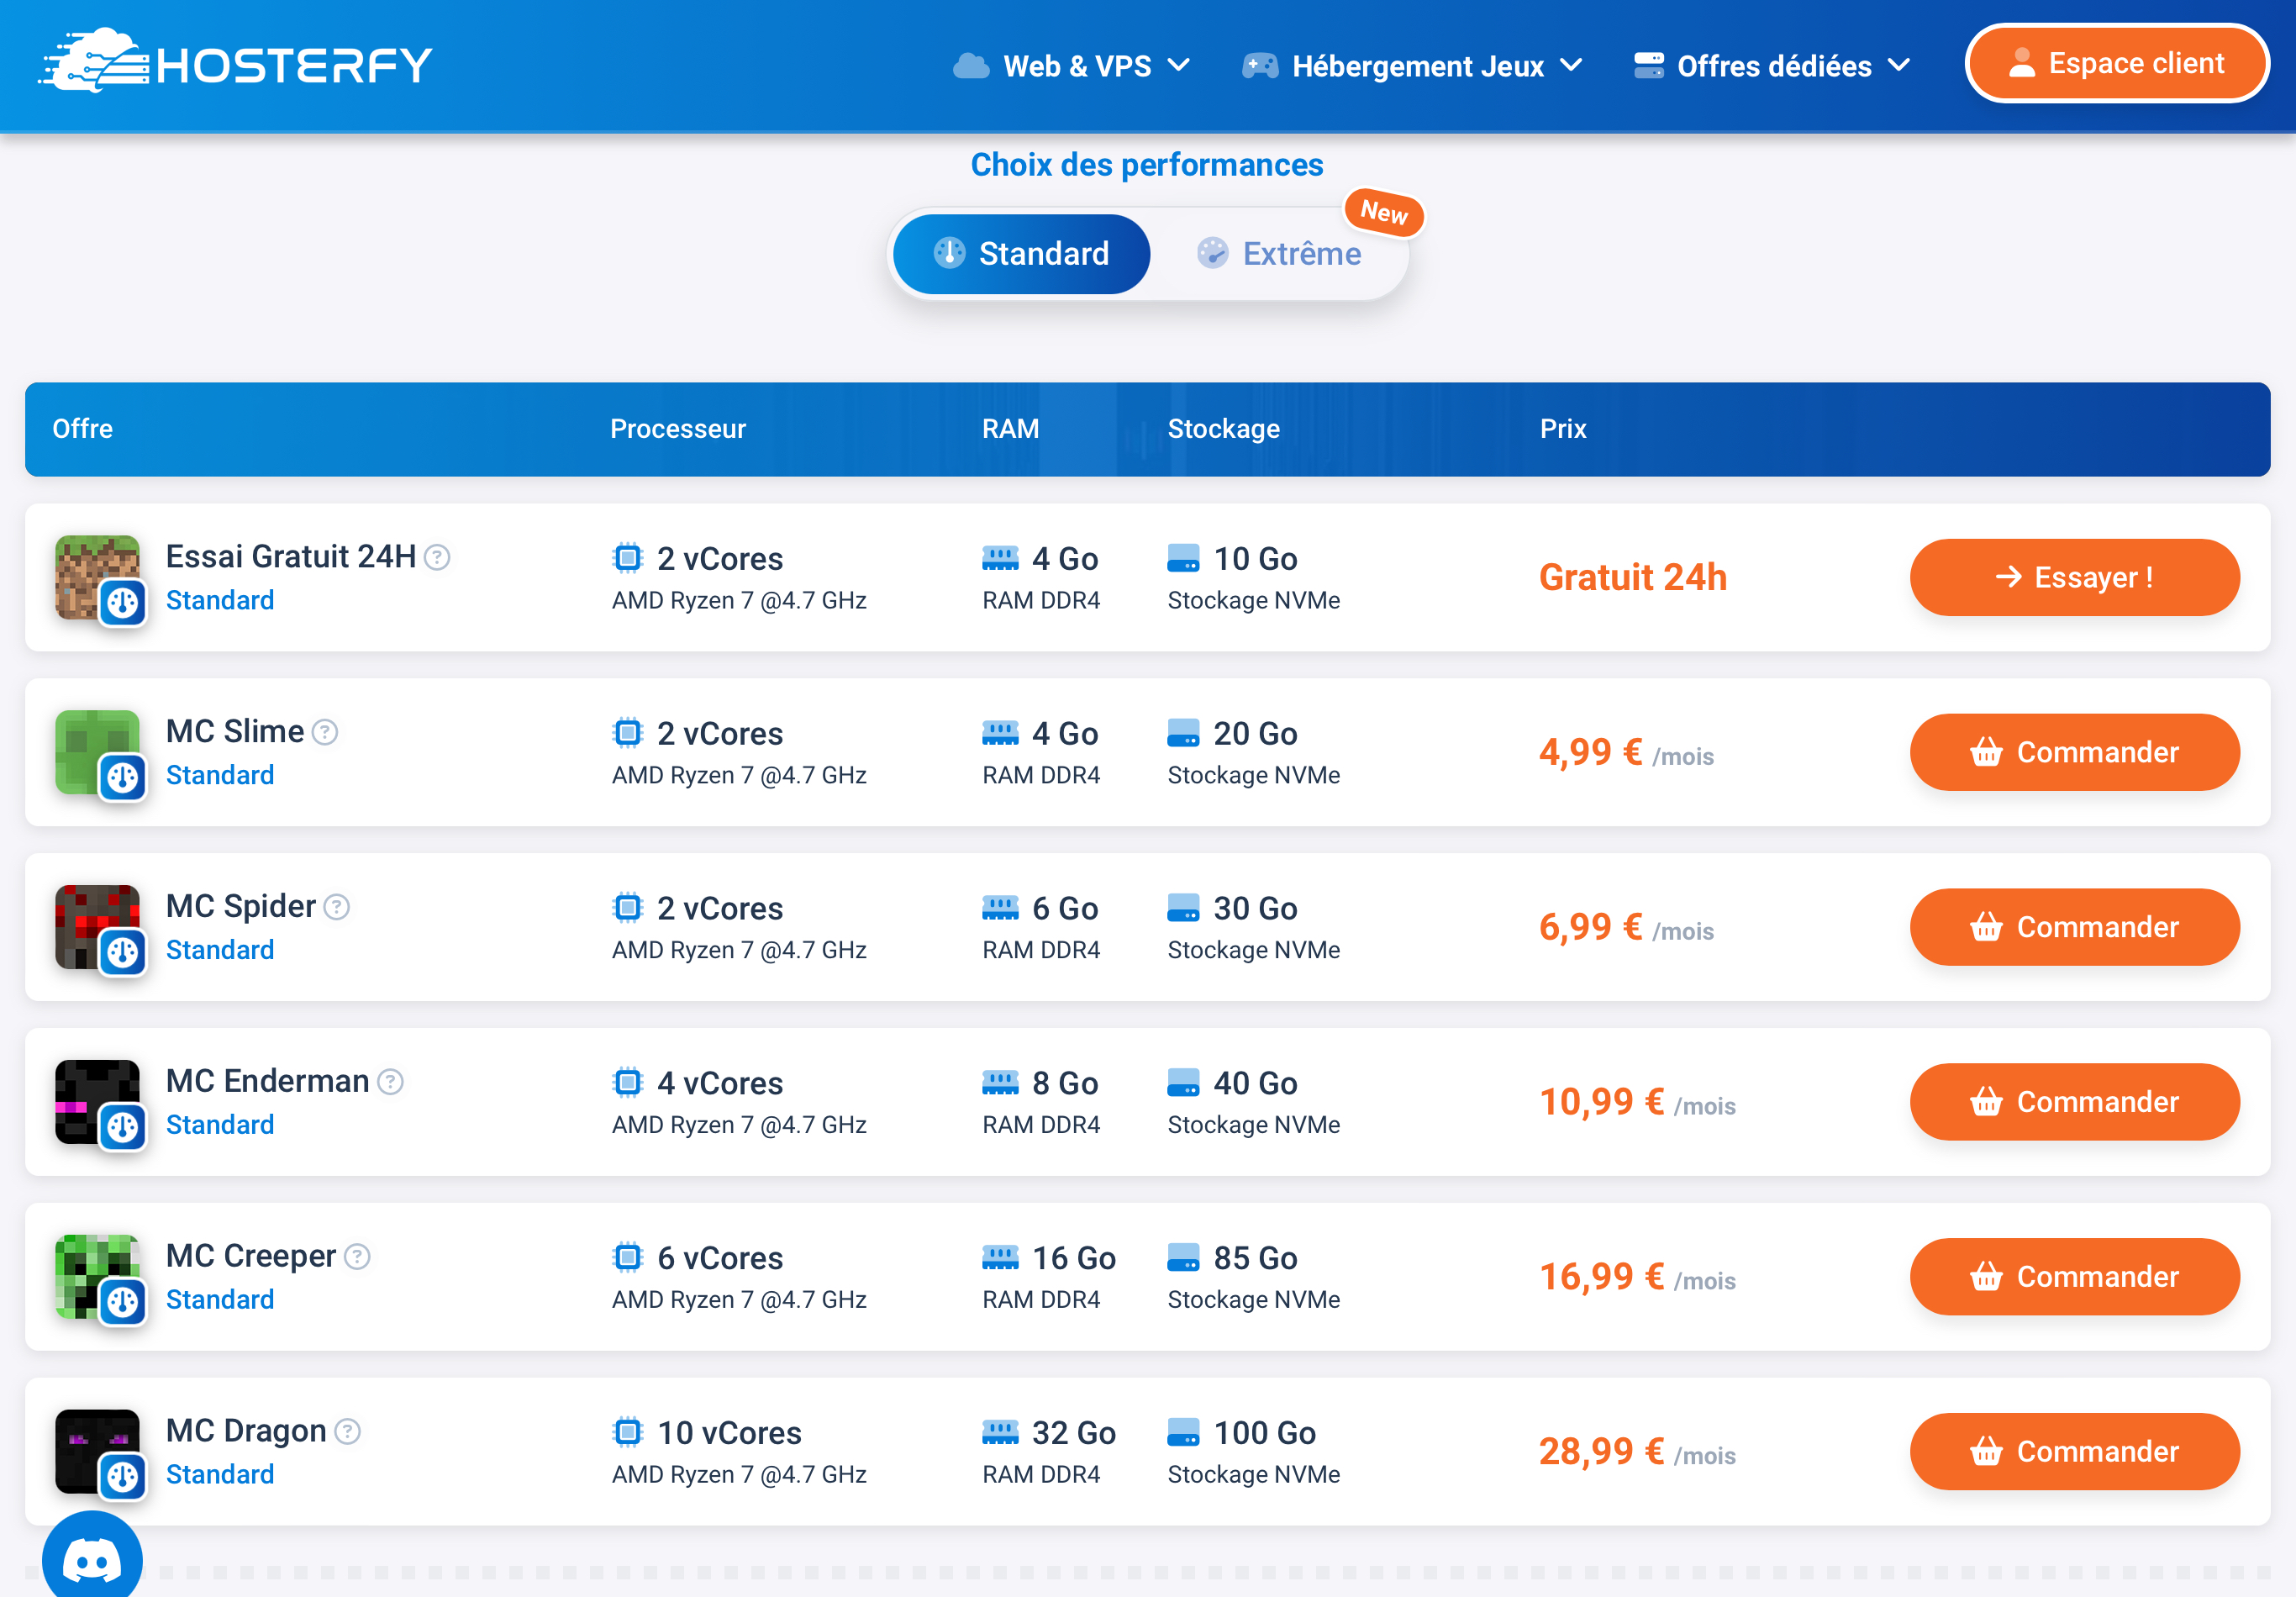
Before choosing between these options, we recommend you revisit section II. Preparations and Requirement Definition, part 2, to select the offer best suited to your server project.
Once you've selected your offer, proceed to order your server. If you don't already have a Hosterfy account, you'll need to create one. Once you've placed your order, you'll be taken to your customer area.
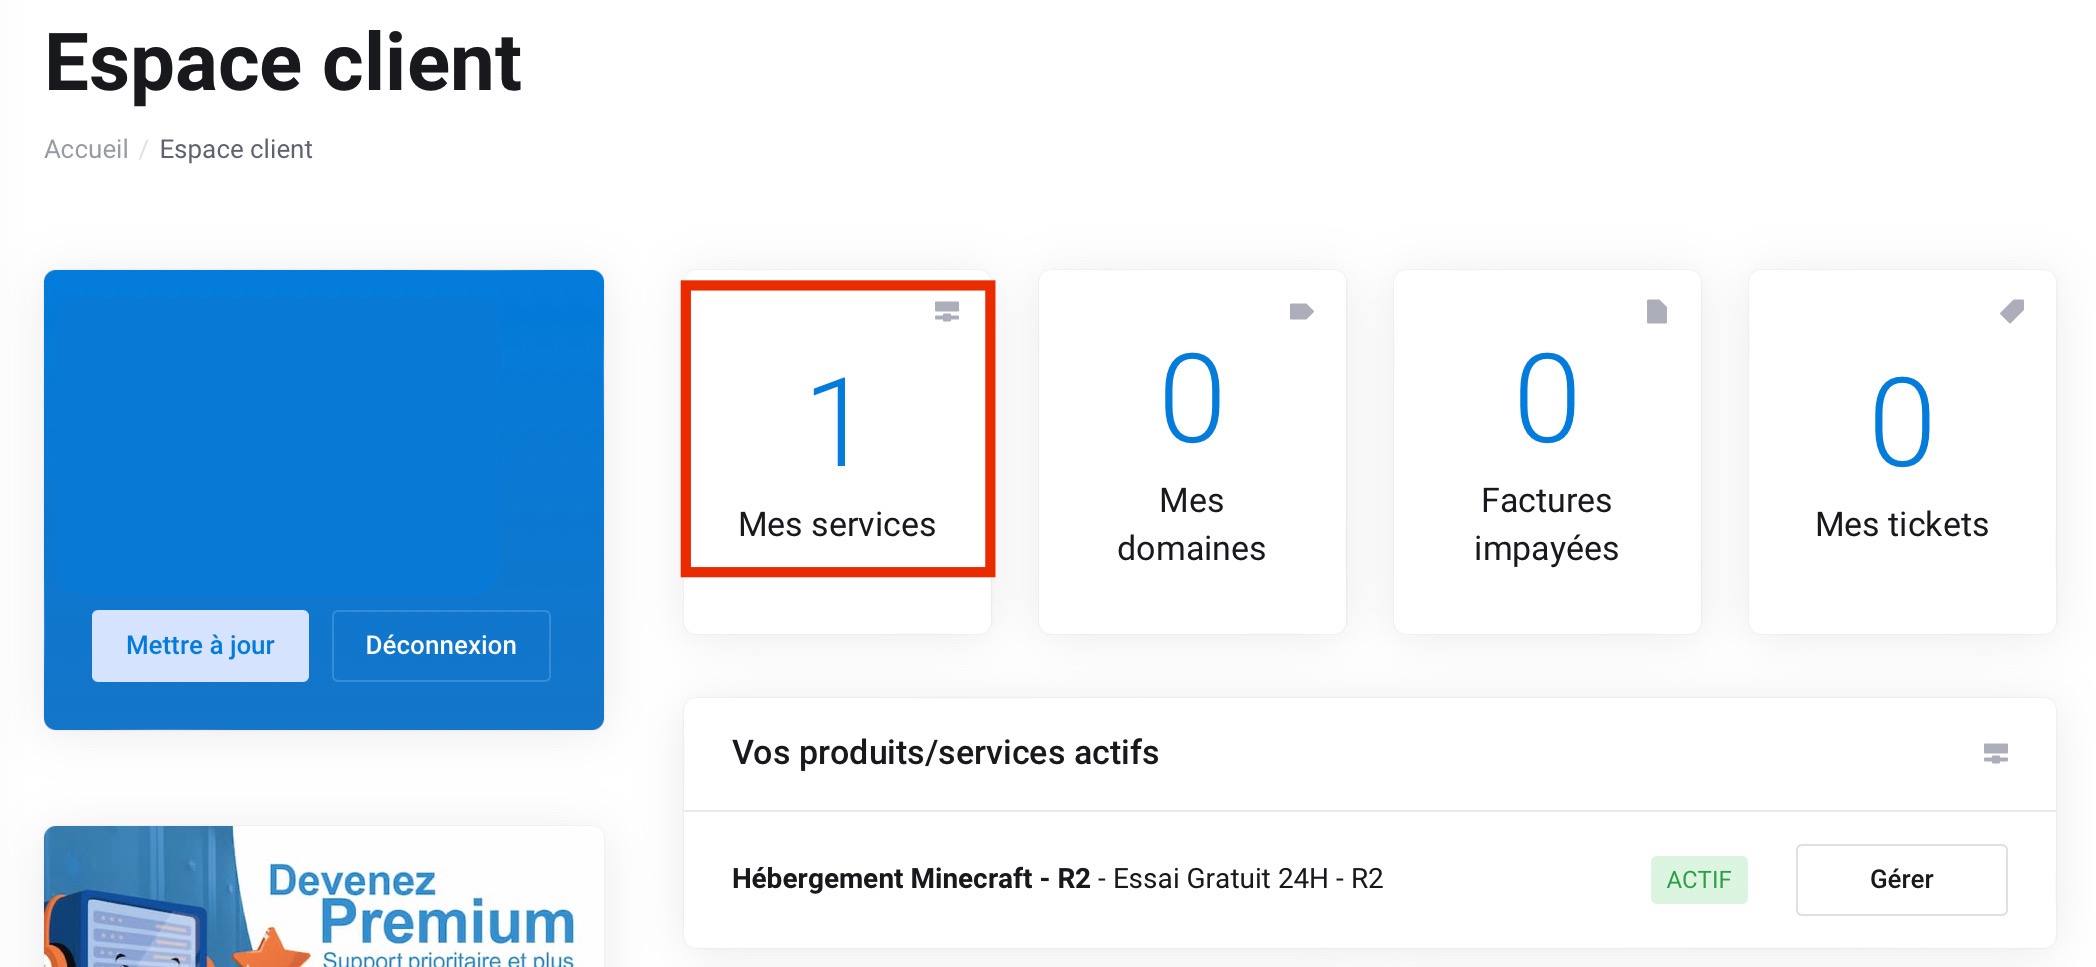
To access your game panel, click on "my services", then you'll be taken to a new page with a list of your offers. 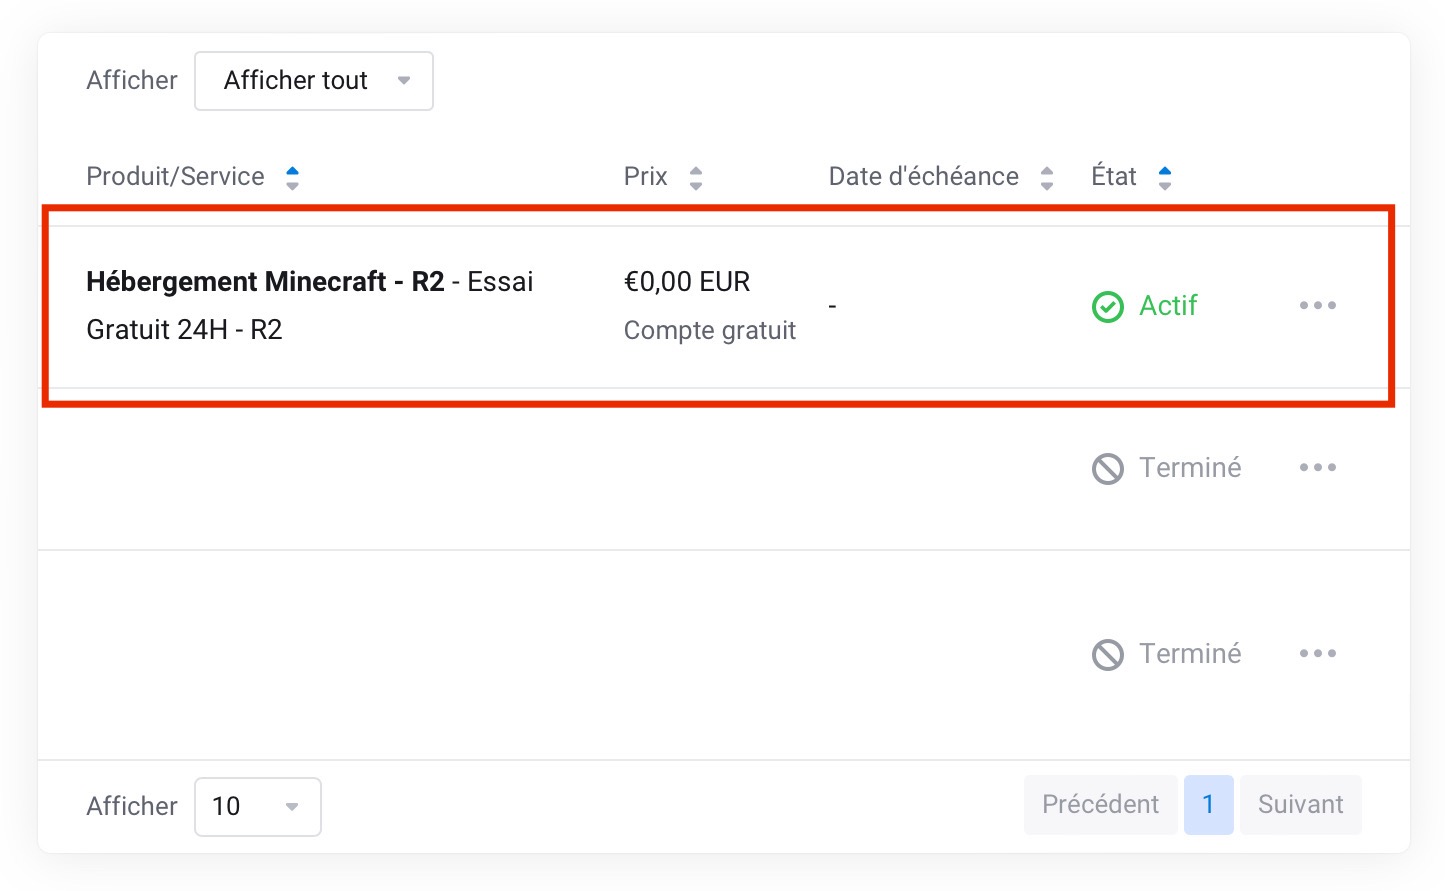
In this area, you'll find the offer you've just acquired listed in your products, as well as your active services under the "My Services" tab. To access your game control panel, click on "My Services", then you'll be redirected to a page listing your active offers. Select the service you have just activated and click on "Access Panel".
Welcome to your magnificent game panel! 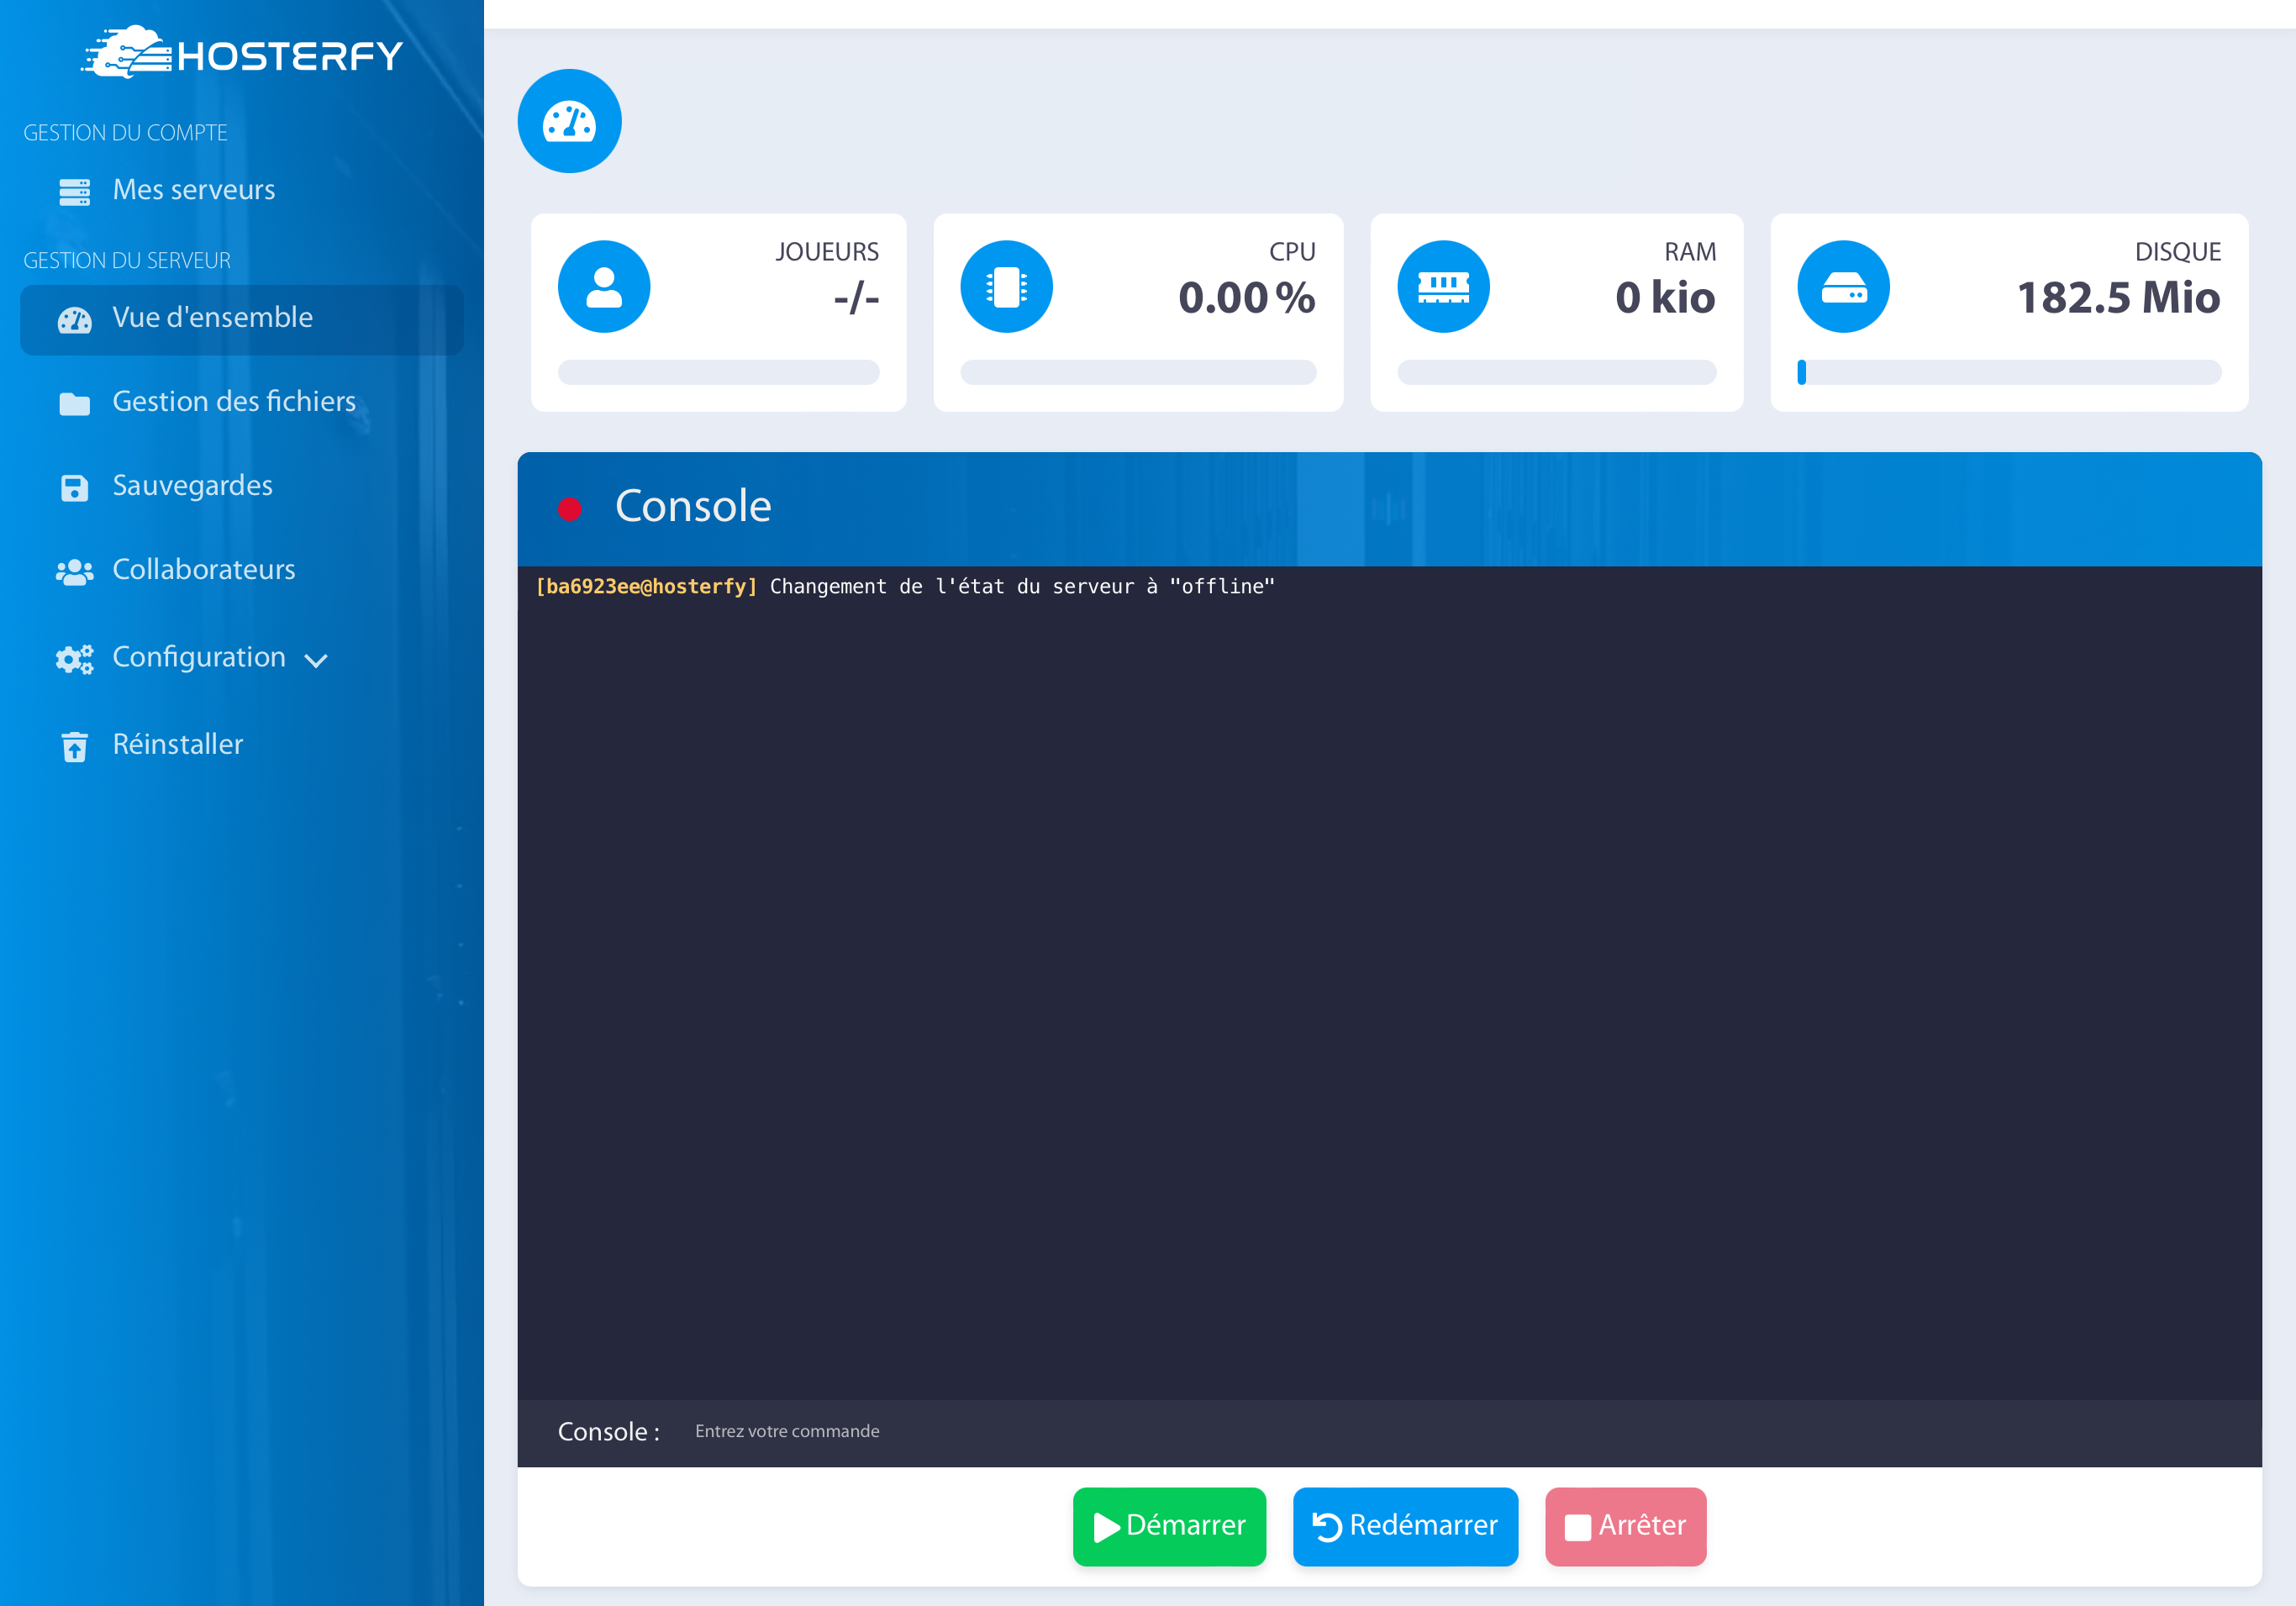
All that's left is to press "Start" to launch your server and begin enjoying the unique experiences offered by Hosterfy.
3) Play with your friends on your Minecraft server
Playing solo can be fun, but the experience becomes even better when shared with friends. This section will guide you through setting up your server to allow multiple players to join in.
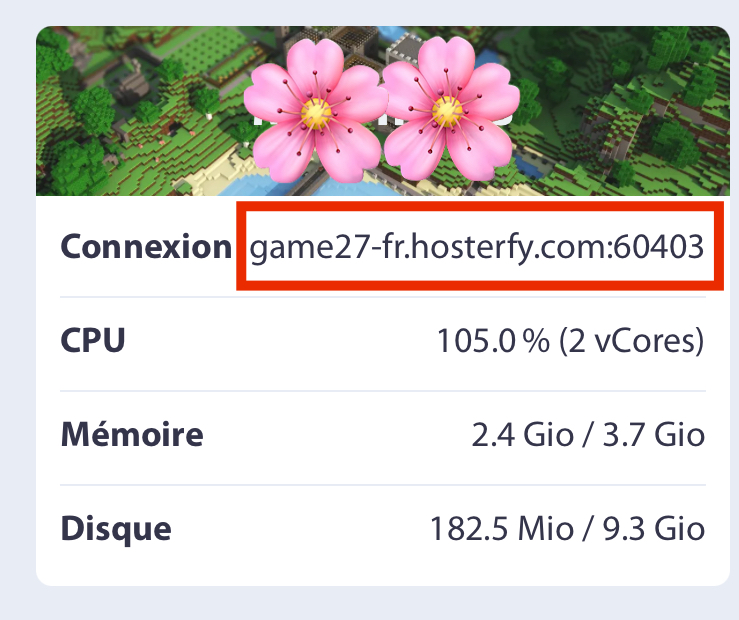
From your game control panel, click on "Start" and wait a few seconds for the server to launch. Once your server is ready to offer you the ultimate Minecraft adventure, locate your server details, including connection address, CPU, memory, etc.
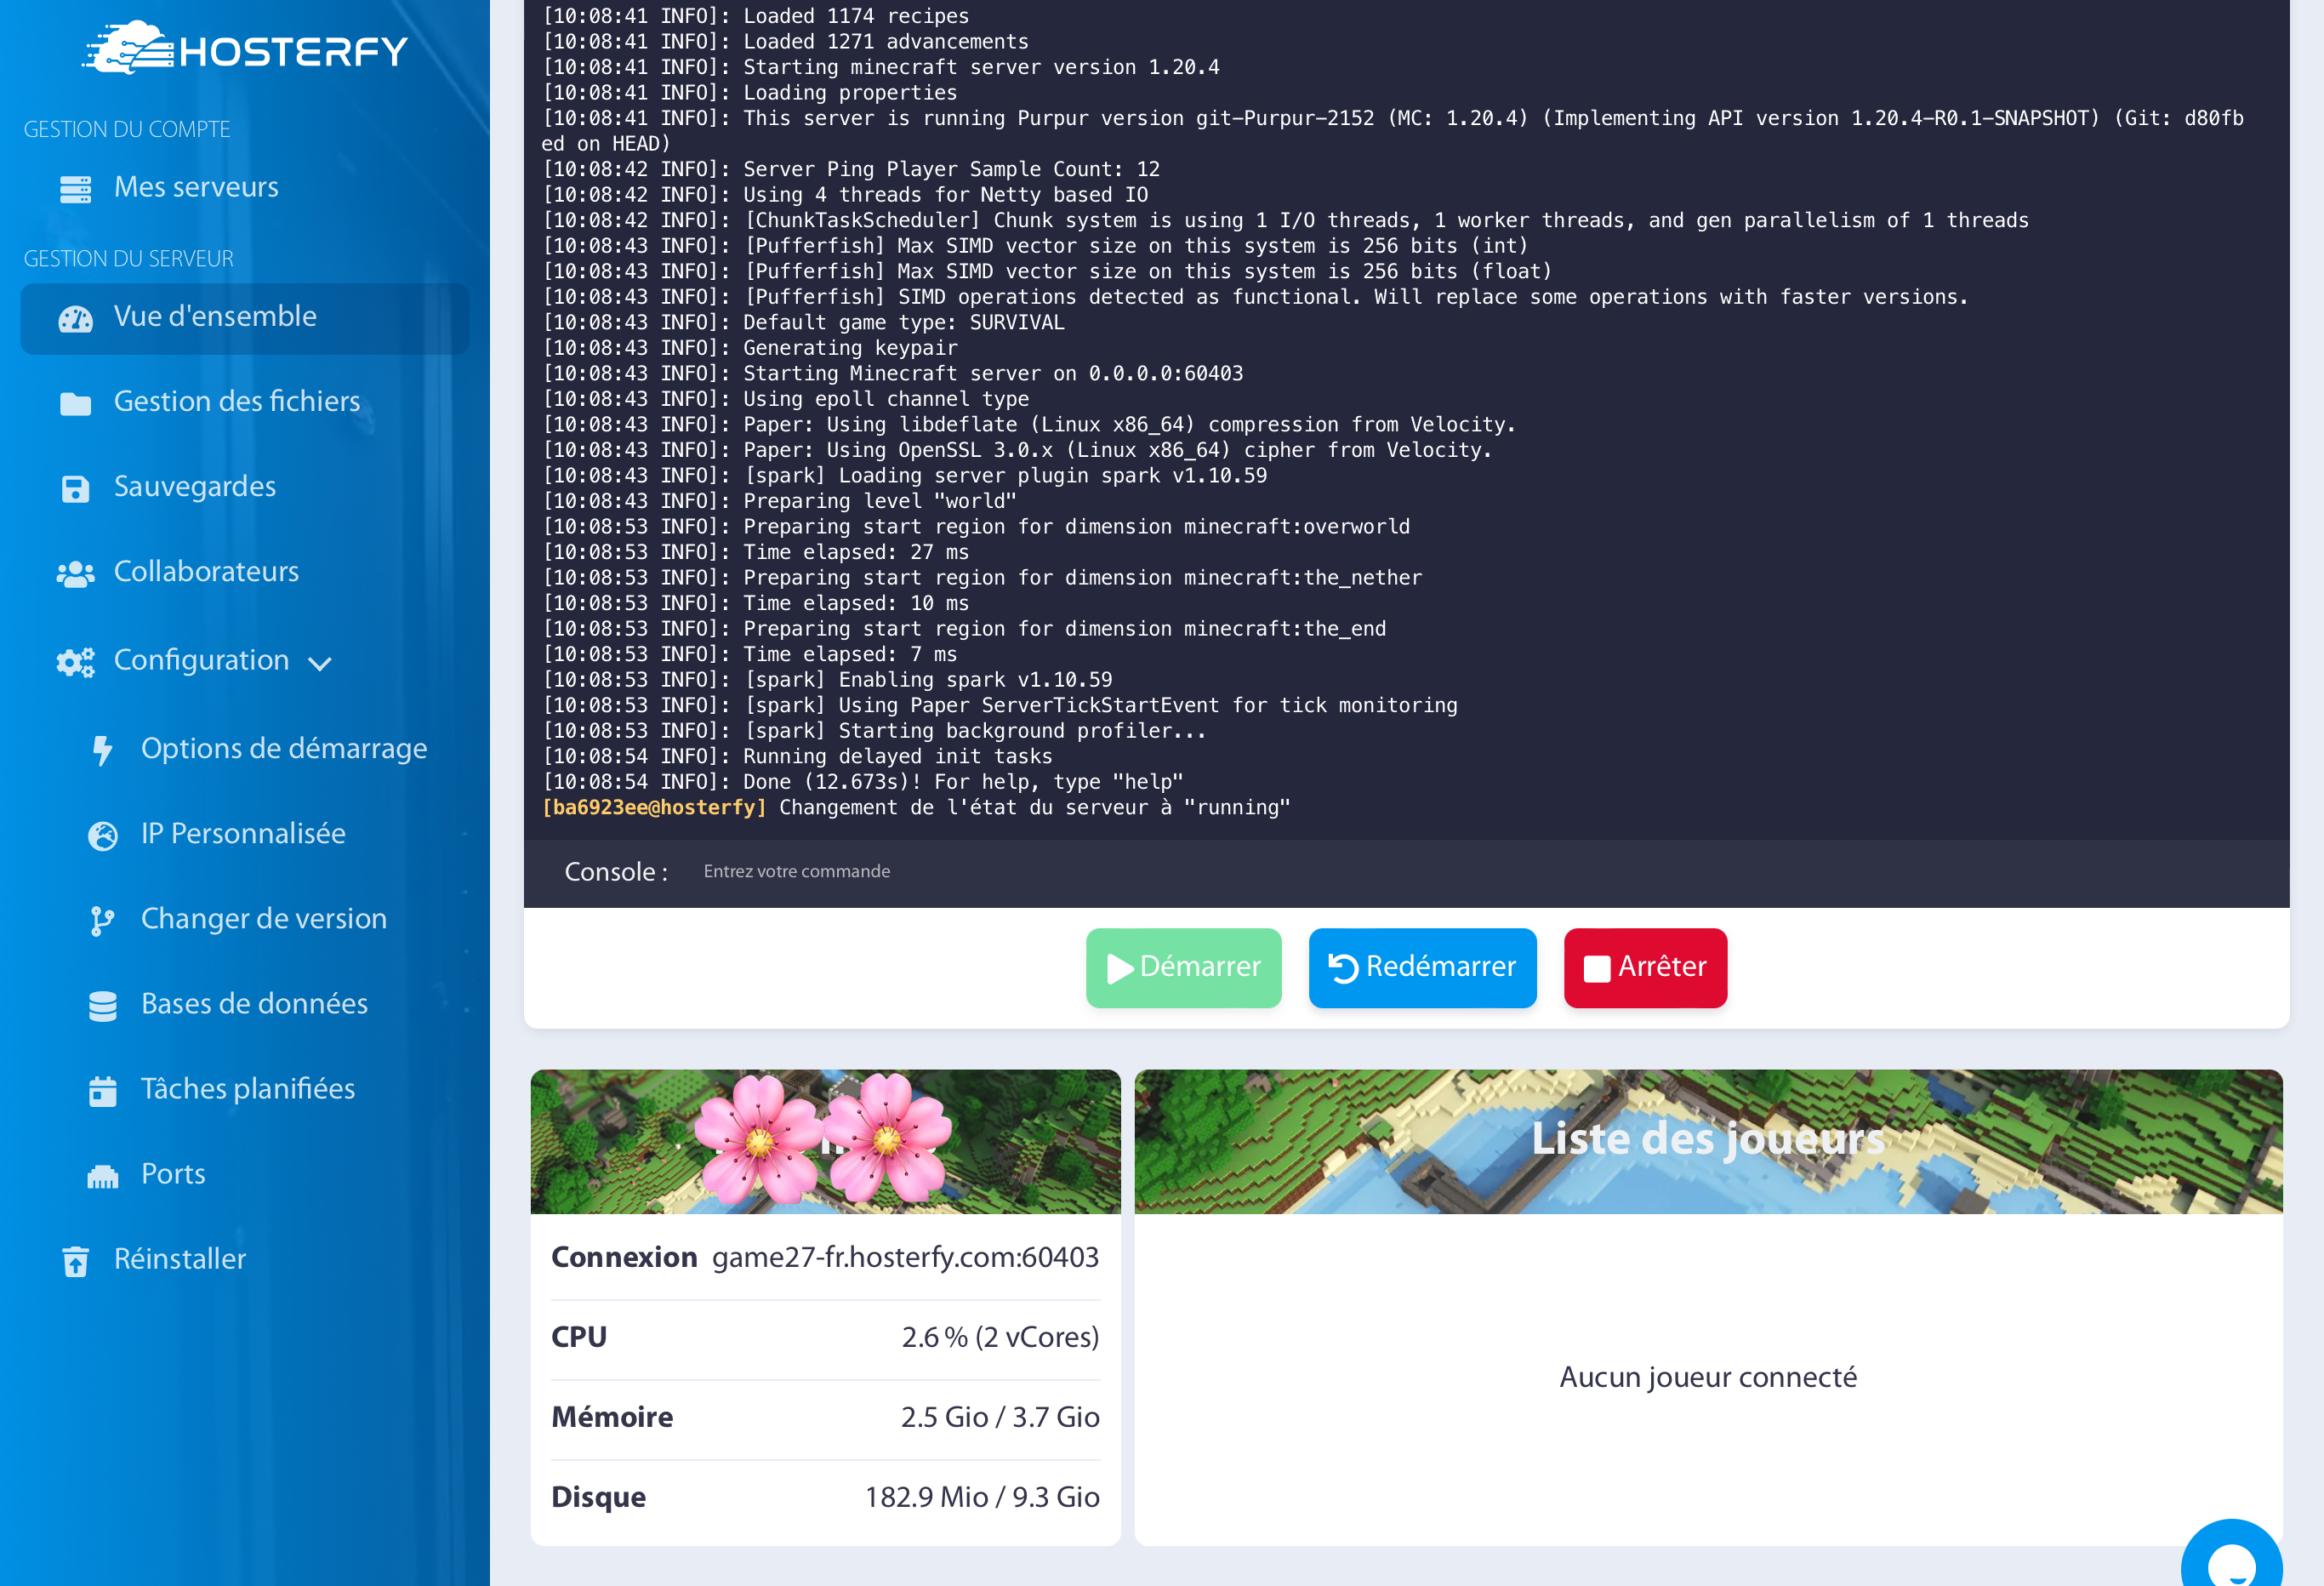
Copy the login address and share it with your friends to dive into the Minecraft adventure together, on your blocks!