Connecting your website to your Minecraft server is essential for automating tasks and offering an interactive experience to your players. The JSONAPI plugin is the perfect tool for this.
In this complete guide, we'll show you step-by-step how to install and configure JSONAPI on your Minecraft server hosted at Hosterfy, taking advantage of our simplified management panel.
What is the JSONAPI plugin for?
JSONAPI is a powerful plugin that creates a bridge between your game server and your external applications (website, store, stats panel). It allows you to execute remote commands and exchange information in real-time.
Examples of use:
- Online Store: Automatically credit a player after a purchase.
- Voting System: Send an in-game reward when a player votes for your server.
- Displaying Statistics: Show the list of connected players directly on your site.
Installing and Configuring JSONAPI
Prerequisites :
- An active Minecraft server (Spigot, Paper, etc.) hosted at Hosterfy.
- Access to your Hosterfy Game Panel.
- The Vault plugin installed on your server. It's an essential dependency for JSONAPI to work correctly, allowing it to communicate with other plugins (economy management, permissions, etc.).
Step 1: Download the JSONAPI Plugin
The first step is to get the plugin. Make sure you download the version compatible with your server.
Step 2: Install the Plugin on Your Server
- Log in to your Hosterfy Game Panel.
- Navigate to the "File Management" tab.
- Open the
pluginsfolder. - Drag and drop the JSONAPI
.jarfile you just downloaded into this folder.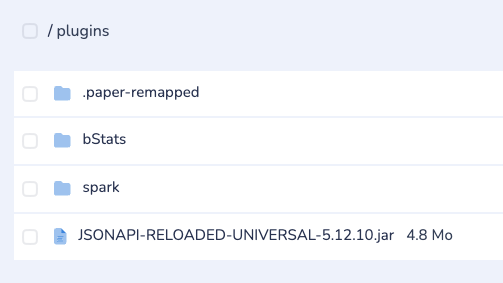
- Restart your server for the first time. This action is essential for the plugin to create its configuration files.
Step 3: Generate a Dedicated Connection Port
For your website to communicate with your server, JSONAPI needs a reserved network port. At Hosterfy, we've made this process as simple as possible.
- In your Game Panel, go to the "Port Management" tab.
- Simply click the "Add a new port" button.
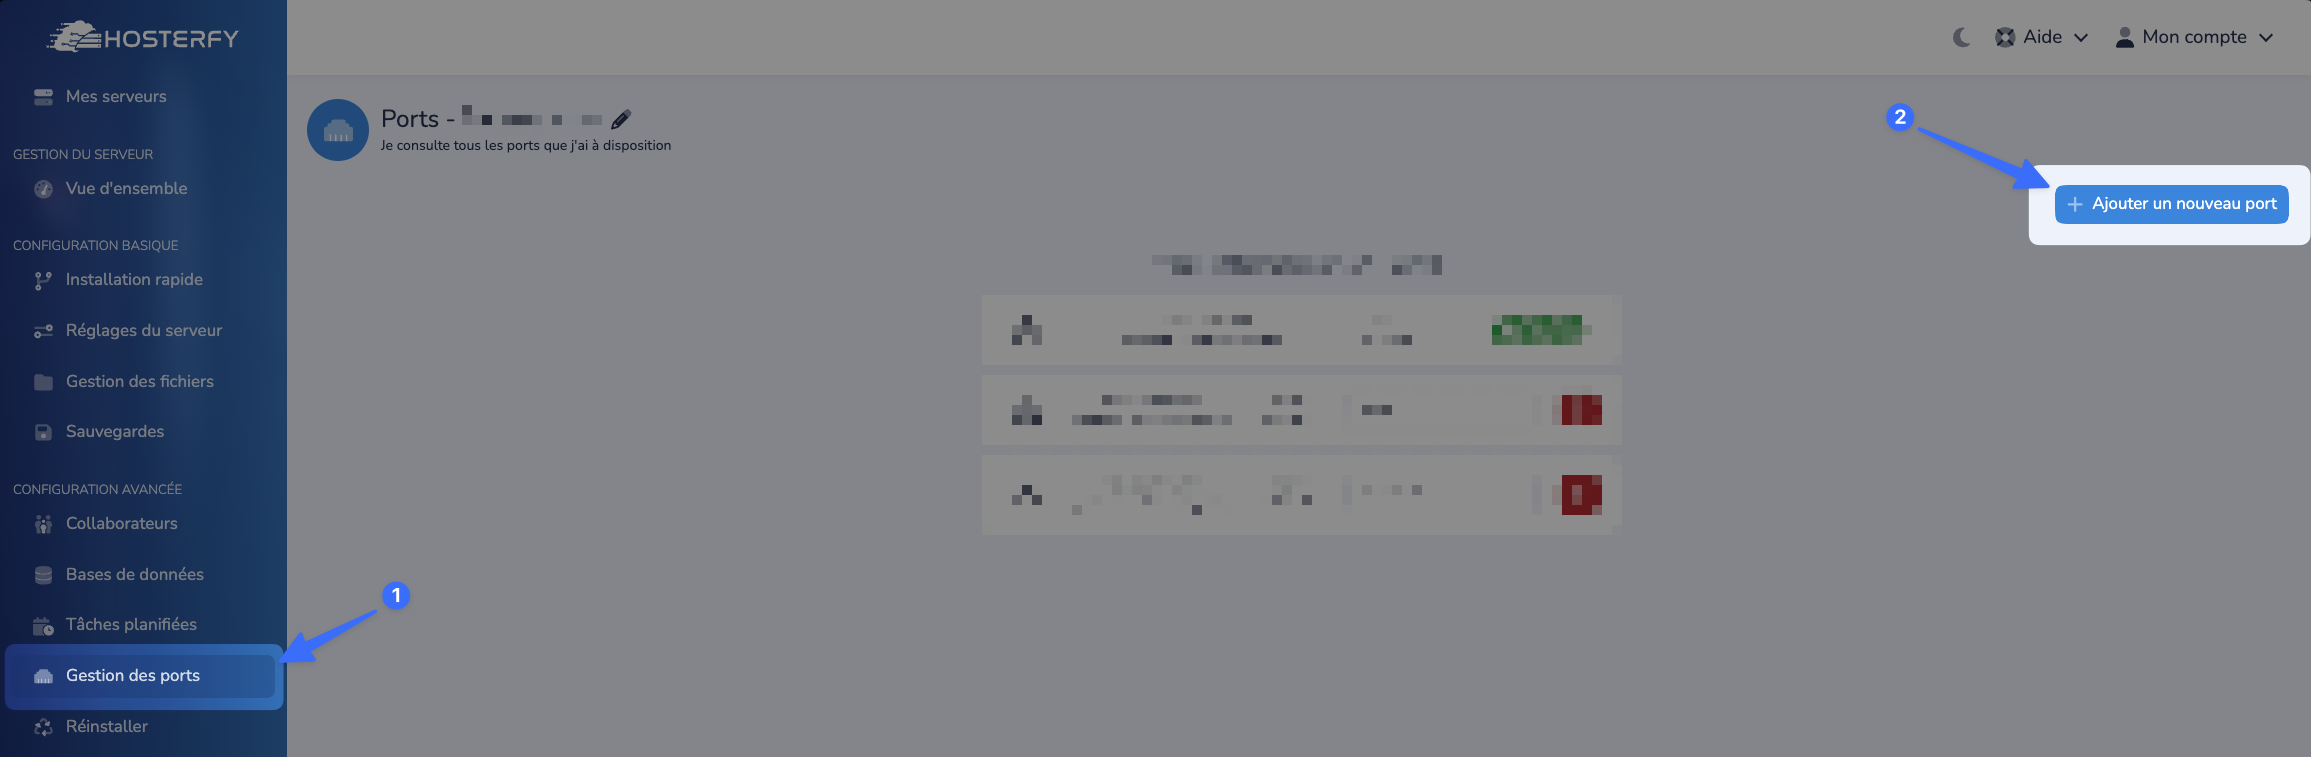
- The panel will instantly assign you a new port. Take careful note of it, as you will need it in the next step.
Step 4: Configure the JSONAPI Plugin
Now that the port has been created and the plugin's files have been generated, all that's left is the final configuration.
- Go back to the "File Management" tab, then into the
pluginsfolder. - Open the
JSONAPIorJSONAPI-RELOADED-UNIVERSALfolder that was created. - Configure the port:
- Open the
config.ymlfile. - Find the line
port: 20059(the number may vary). - Replace the value with the new port you generated in Step 3.
- Save the file.

- Open the
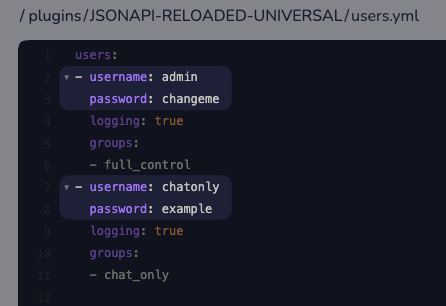
- Configure the login credentials:
- Open the
users.ymlfile. - Modify the
usernameandpassword. - Security Alert: It is imperative to choose a long and complex password (letters, numbers, symbols) to secure access to your server. Do not skip this step!
- Save the file.
- Open the
Step 5: Finalizing
Restart your Minecraft server one last time for all changes to take effect.
And that's it! Your JSONAPI plugin is now installed, configured, and ready to be connected to your website.
If you encounter any difficulties, feel free to contact our technical support by opening a ticket in your client area. Our team is here to help!


Post a comment
Comments