Introduction
Do you dream of talking directly with your friends in-game, with sound that adjusts to your distance, just like in real life? Proximity voice chat completely transforms the immersion in Minecraft. No more need for Discord; chat directly with the players you meet on your adventure!
Installing this might seem complex, but don't worry. With your Hosterfy panel, it's a matter of minutes. This guide will walk you through, step by step, to install and configure the Simple Voice Chat mod, the most popular solution for voice chat.
Before you start
To follow this tutorial, make sure you have:
- ✅ An active Minecraft server hosting plan at Hosterfy.
- ✅ Knowledge of whether your server uses plugins (Spigot, Paper, Purpur) or mods (Forge, Fabric, NeoForge). This is crucial for choosing the right file!
Step 1: Download the correct version of the mod
The first step is to download the file that matches your server type. Simple Voice Chat is available as both a plugin and a mod.
- If your server uses plugins (Paper, Spigot...): Download the "Spigot" version here.
- If your server uses mods (Forge, Fabric...): Download the version corresponding to your loader (Forge, Fabric, or NeoForge) here.
⚠️ Make sure to choose the version compatible with your server's Minecraft version (e.g., 1.20.4, 1.21, etc.).
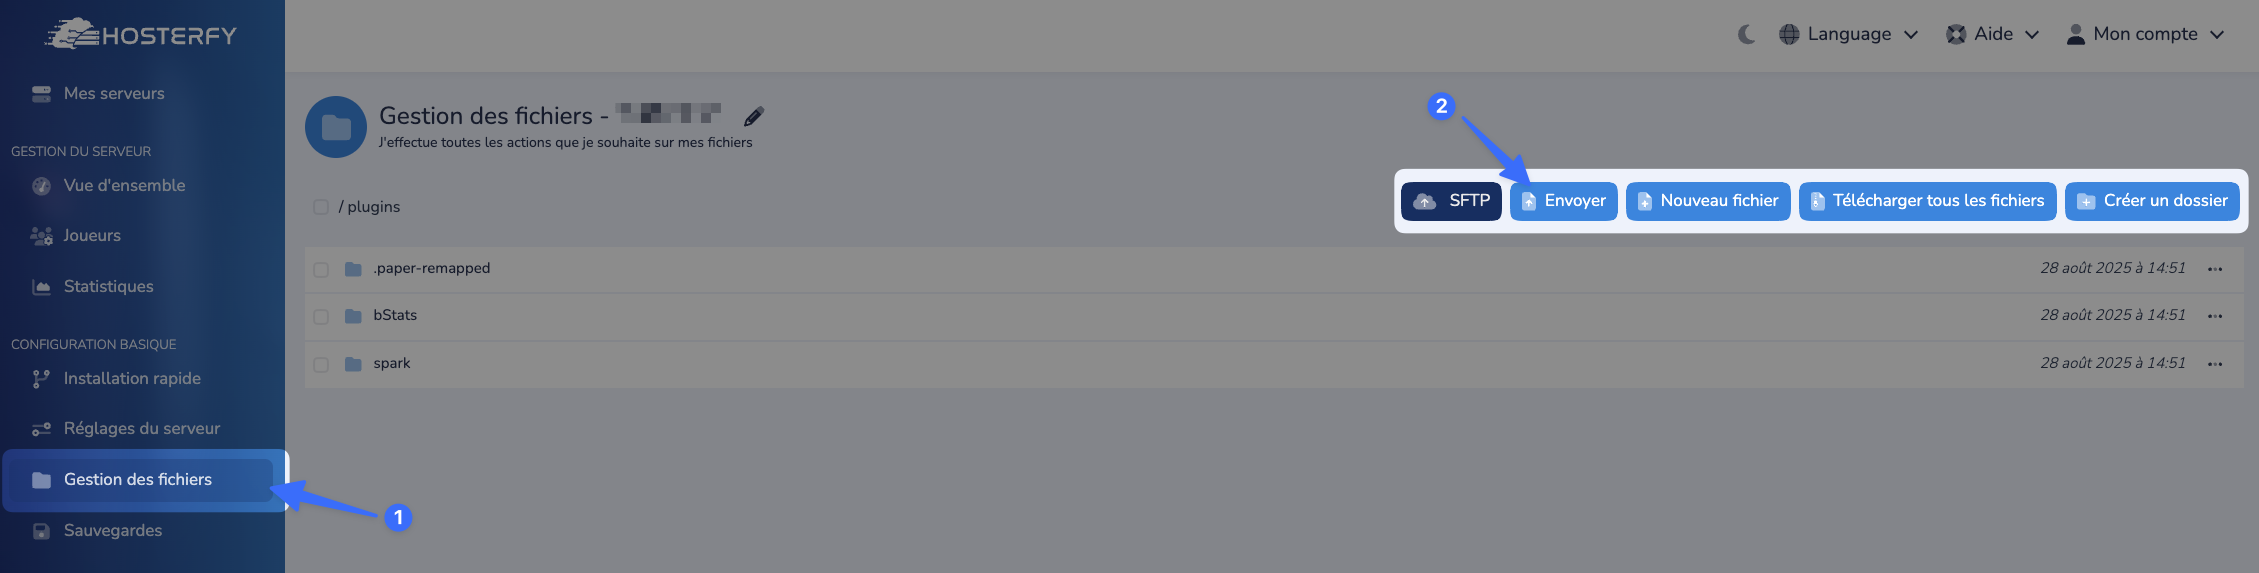
Step 2: Install the file on the server
Now that you have the .jar file, you need to place it in the correct folder on your server using our file manager.
- Log in to your Hosterfy management panel and select your server.
- In the left-hand menu, click on "File Management".
- Navigate to the corresponding folder:
- For the plugin version, go to the
/pluginsfolder. - For the mod version, go to the
/modsfolder.
- For the plugin version, go to the
- Click the "Upload" button and select the
.jarfile you just downloaded. You can also drag and drop the file into the web interface.
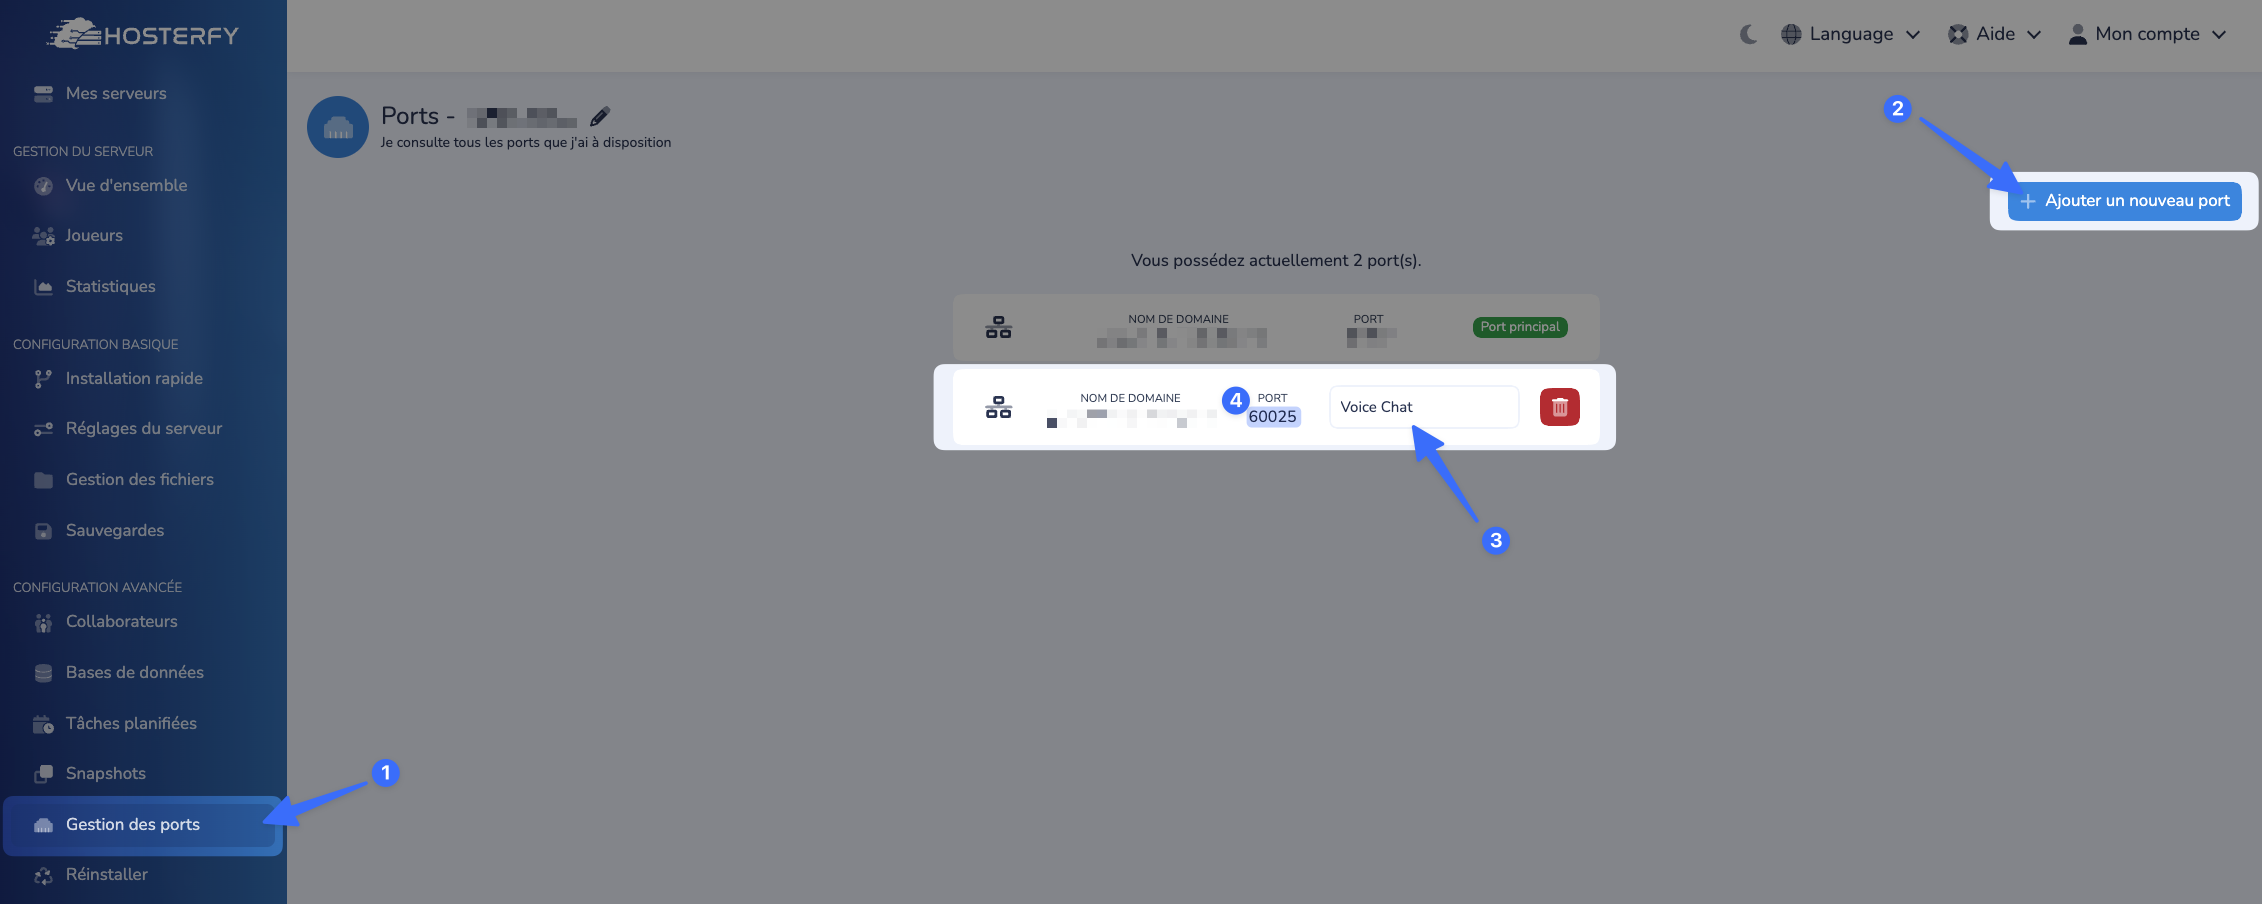
Step 3: Create a dedicated port for voice chat
For the voice chat to work, it needs its own "communication channel," called a port. Our panel allows you to create one in just two clicks. For more details on how ports work, you can consult our guide detailing how to add an additional port to a game server.
- First, start your server once. This will generate the necessary configuration files. Once it's started, shut it down.
- In the left-hand menu of the panel, go to the "Port Management" section.
- Click the "Add new port" button. The panel will assign you a new port (a 5-digit number).
- In the "Description" field, you can write "Voice Chat" to remember its purpose.
- Copy this port number; we'll need it shortly.
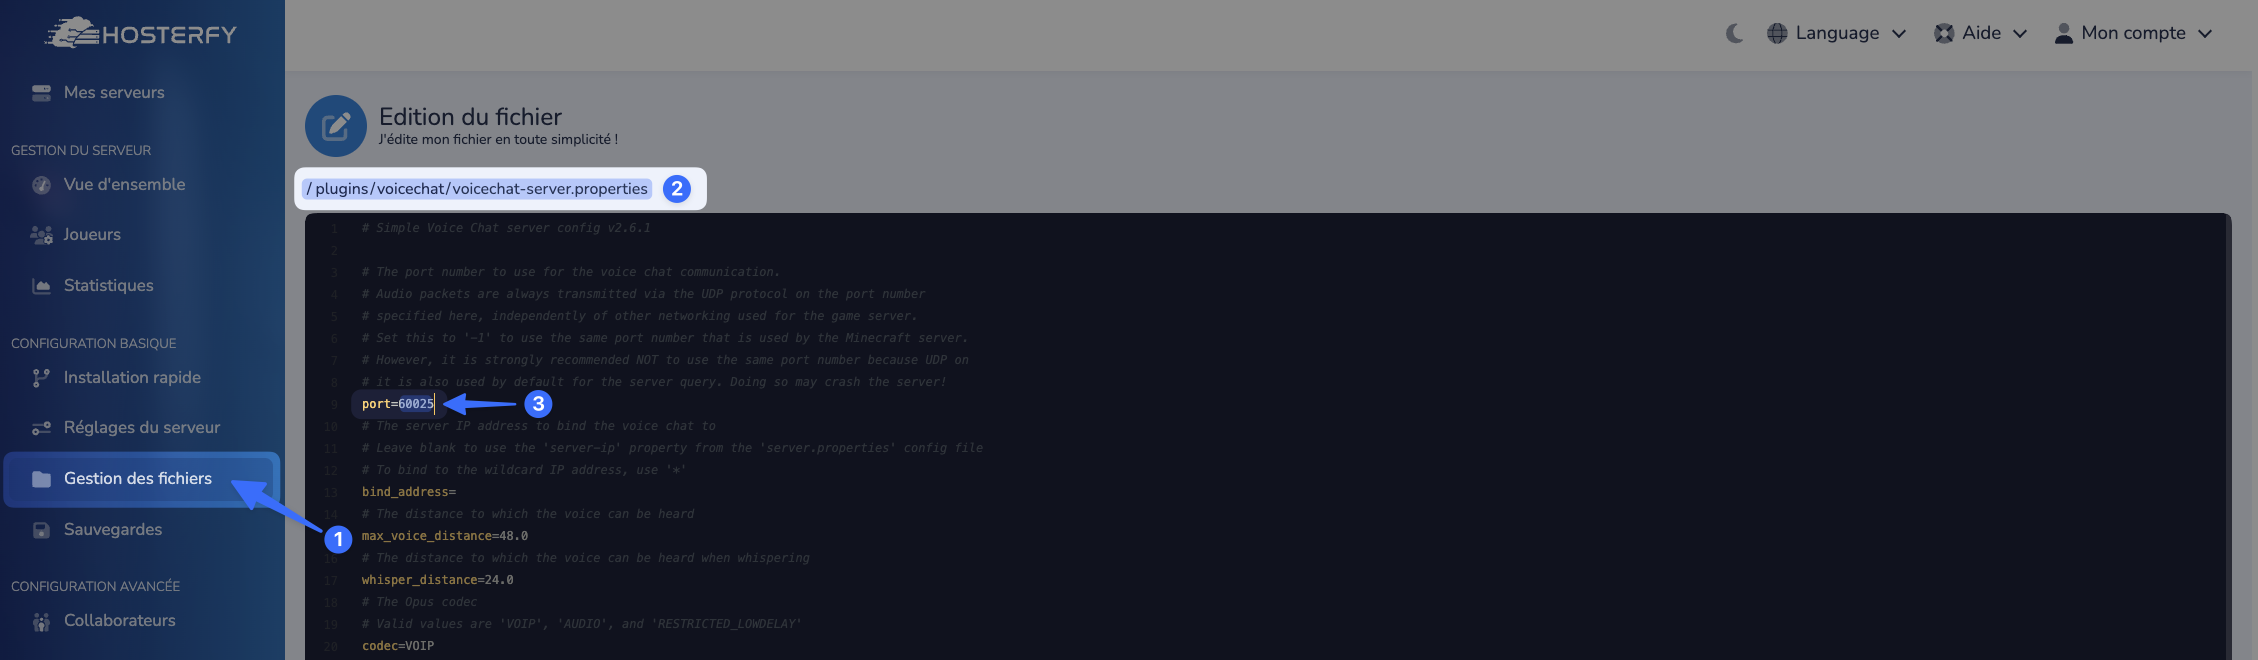
Step 4: Configure the port in the files
All that's left is to tell the mod/plugin which port to use.
- Go back to the "File Manager".
- Open the configuration file that was generated:
- For the plugin version: navigate to
/plugins/voicechat/and edit thevoicechat-server.propertiesfile. - For the mod version: navigate to
/config/voicechat/and edit thevoicechat-server.propertiesfile.
- For the plugin version: navigate to
- Look for the line that starts with
port=. - Paste the port number you copied in the previous step right after the
=sign (in our example, this is port 60025). - Save the file.
Step 5: Restart and play!
This is the final step!
- Go back to your server's main page ("Overview").
- Click the green "Start" button.
Your server is now ready!
Very important: For this to work, all players (including you) must install the mod version of Simple Voice Chat (for Fabric, Forge, or NeoForge) on their own Minecraft game. The server runs the system, but each player's game needs the mod to connect to it.
Troubleshooting & Common Issues
The voice chat isn't working in-game.
- Check #1: Have all players, without exception, installed the mod on their game client?
- Check #2: Did you restart the server after changing the port in the configuration file?
- Check #3: Is the port configured in the file exactly the same as the one generated in the "Port Management" section?
My server won't start anymore.
This is often due to a version incompatibility. Check that the version of the mod/plugin you downloaded matches both the Minecraft version AND your server type (Paper, Fabric, etc.).
If the problem persists, our team is here to help! Feel free to open a ticket or contact us on our community Discord.


Post a comment
Comments