Introduction
Want to enjoy the latest Minecraft features on your own server? Updating your world can sometimes seem technical and risky, especially when you're new to server management.
Don't panic! This guide is specially designed for you. We'll show you how to update your Minecraft server in minutes, directly from your Hosterfy panel, without a single line of code. The promise is simple: a fast, secure, and stress-free update.
Together, we'll see how to securely prepare your server, use our installation tool to change versions in the blink of an eye, and what to do if you encounter a small unforeseen issue along the way.
Before you begin
To follow this guide, you will simply need:
- ✅ An active Minecraft server hosting with Hosterfy.
- ✅ Access to your server's management panel.
Step 1: Prepare and shut down your server
Before touching game files, it is crucial to properly shut down the server. This is an essential step to avoid any data corruption or loss of progress during the update.
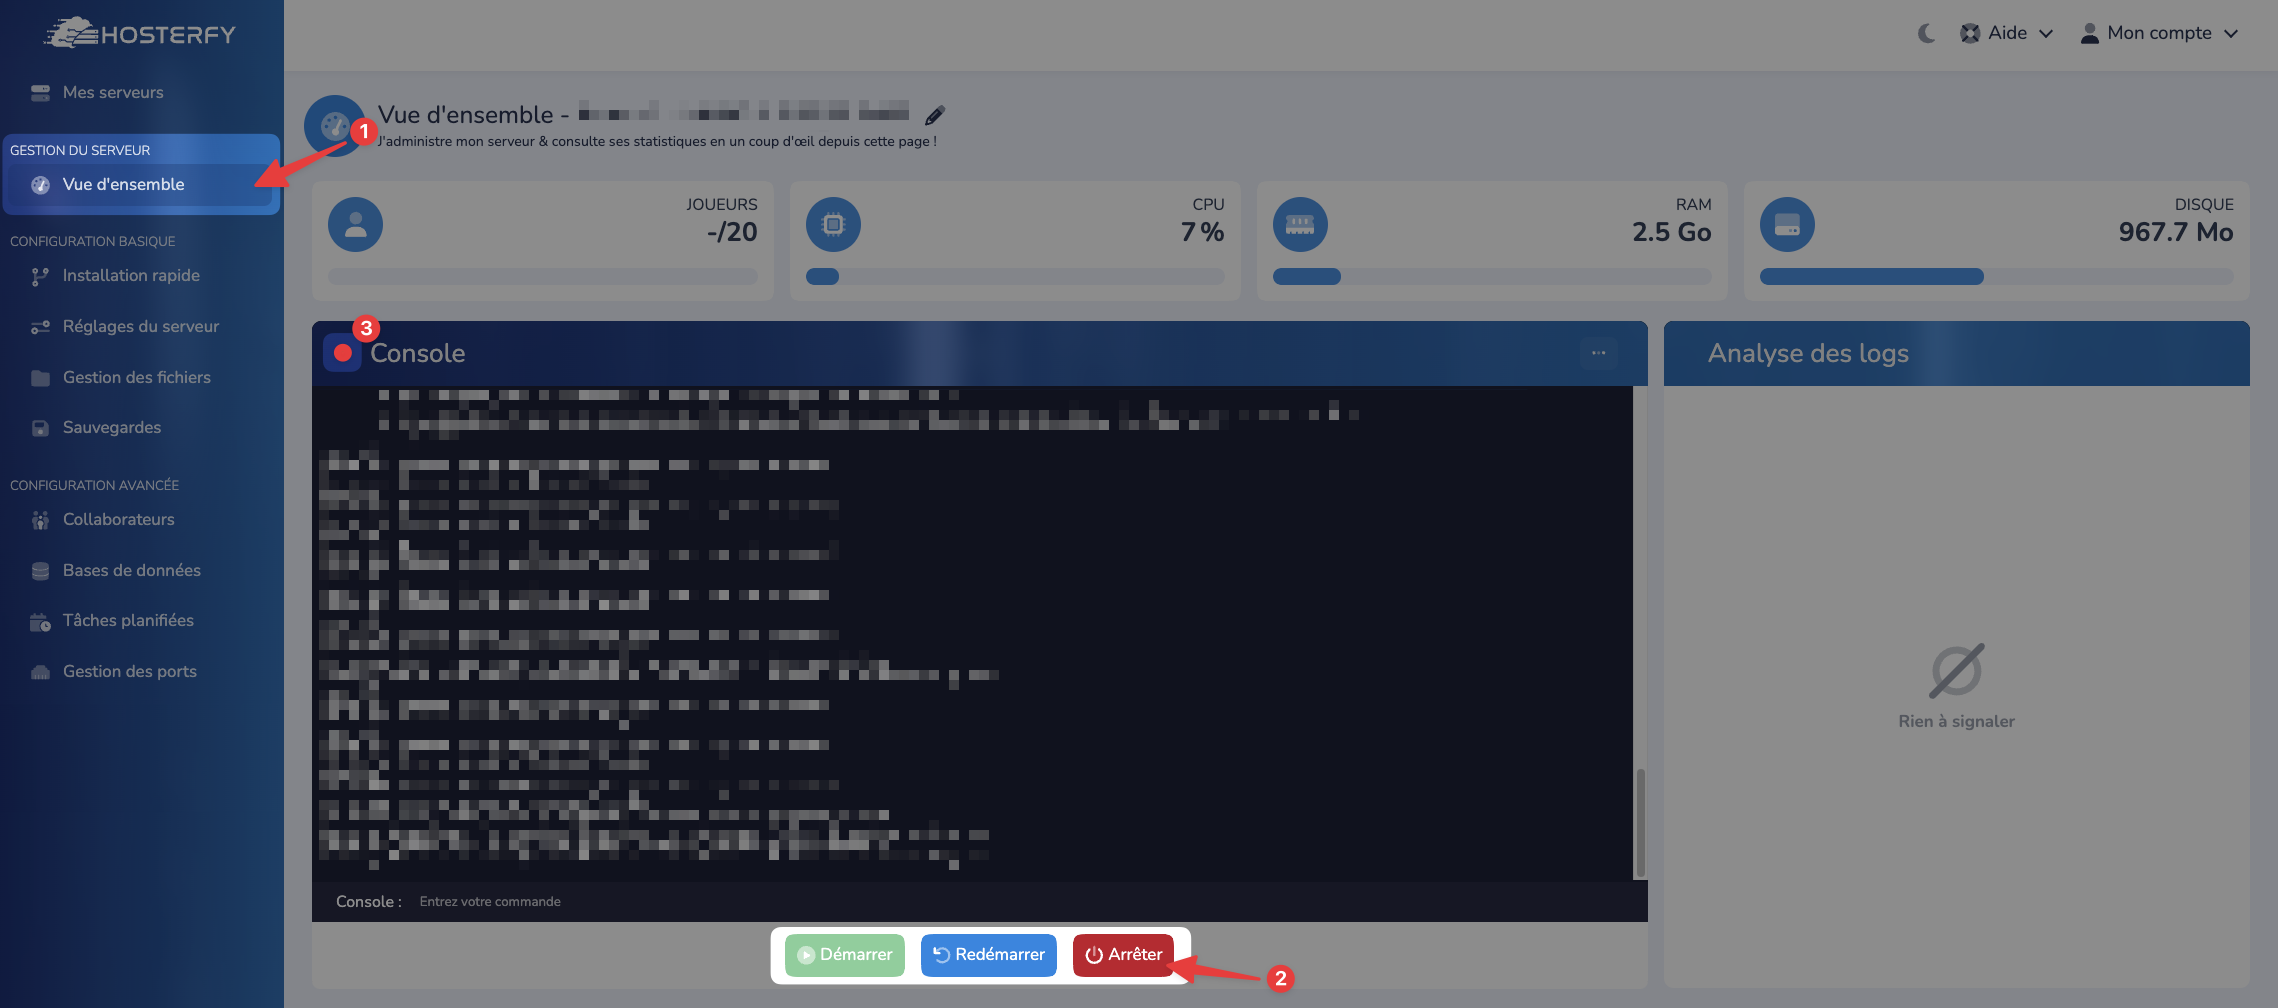
- Connect to your Hosterfy management panel.
- Select your Minecraft server.
- Click on the red "Shut Down" button and wait until the server status indicates it is offline (see red dot at the top left of the console).
Pro Tip: Before any major update, we recommend performing a backup. This is your best insurance in case of a problem. Feel free to consult our complete guide on backing up your server for more security.
Step 2: Launch the update via Quick Install
This is where Hosterfy's magic happens. Our tool takes care of everything: it downloads the new files for the version you've chosen and installs them correctly for you.
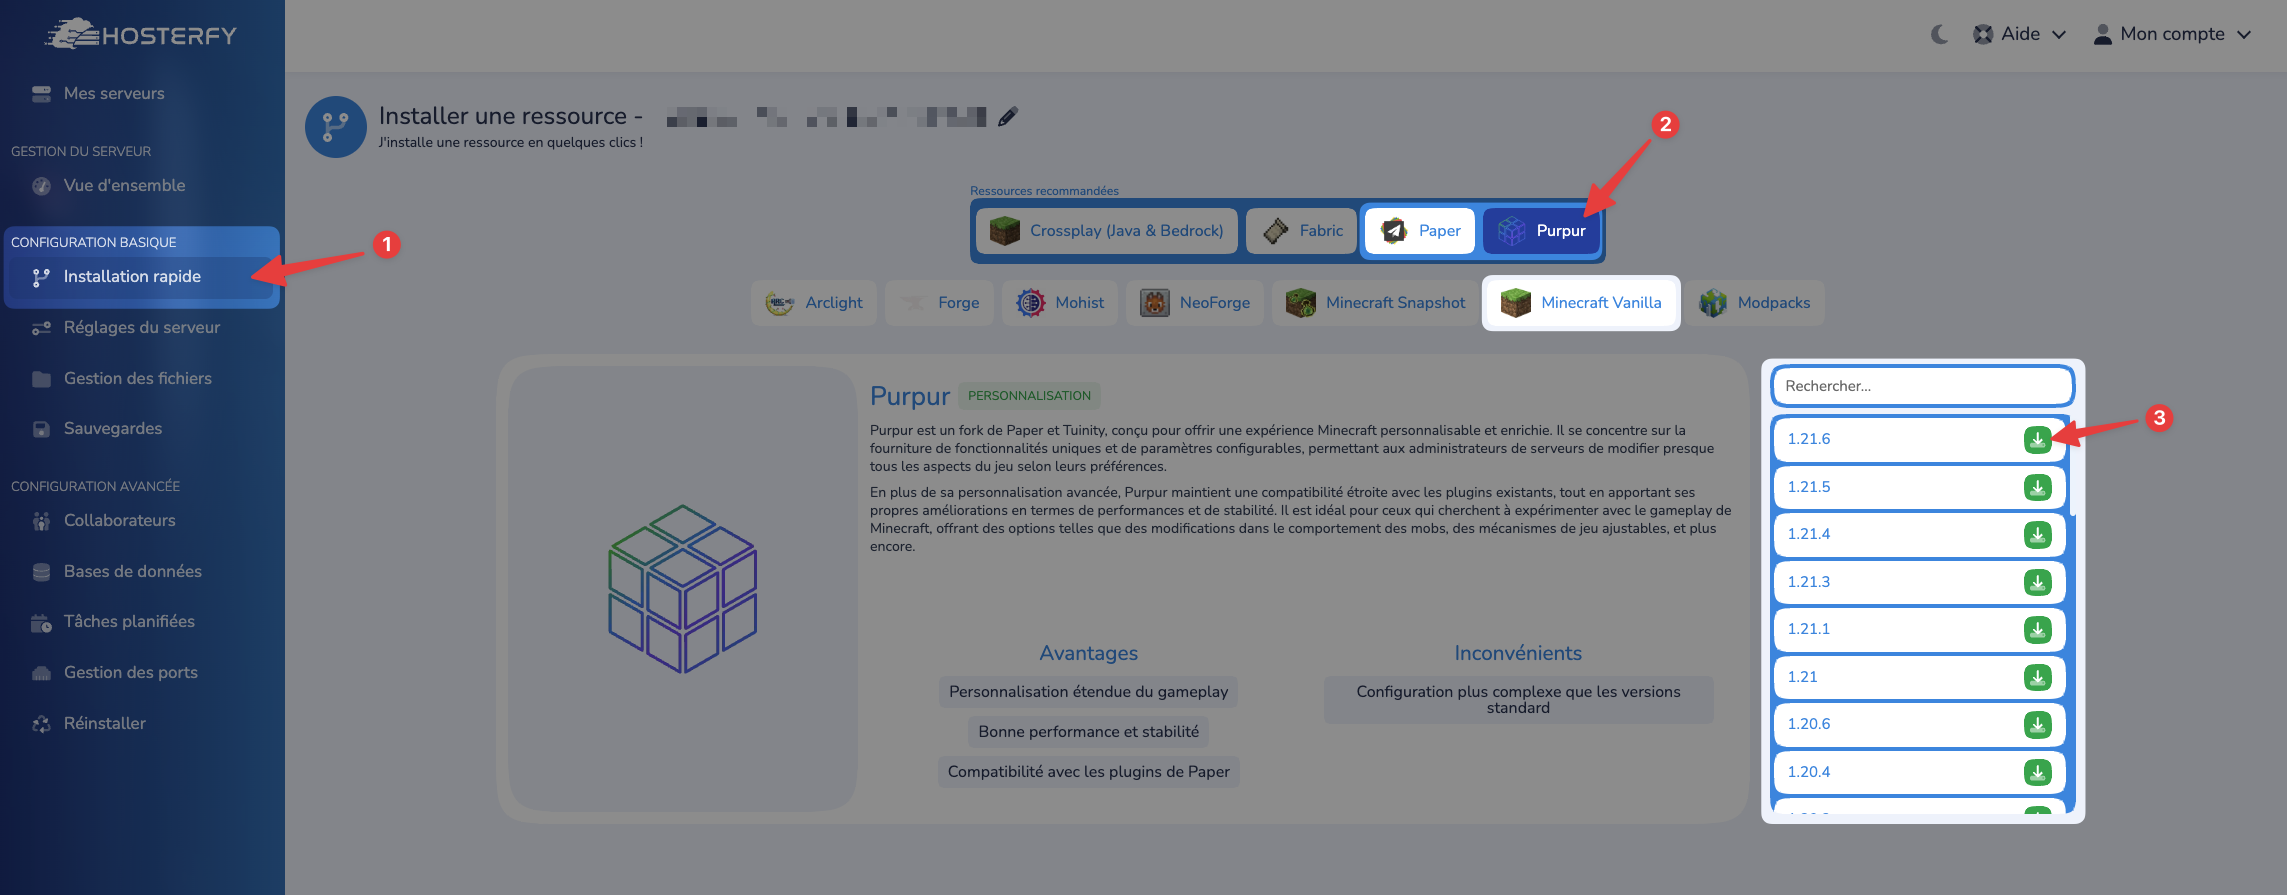
- On your panel, navigate to the "Quick Install" tab.
- Search for the category that corresponds to the version you wish to install.
- In the dropdown menu, select the new game version you wish to install (for example, Paper 1.21, Spigot 1.21, etc.).
- Click on the "Install" button.
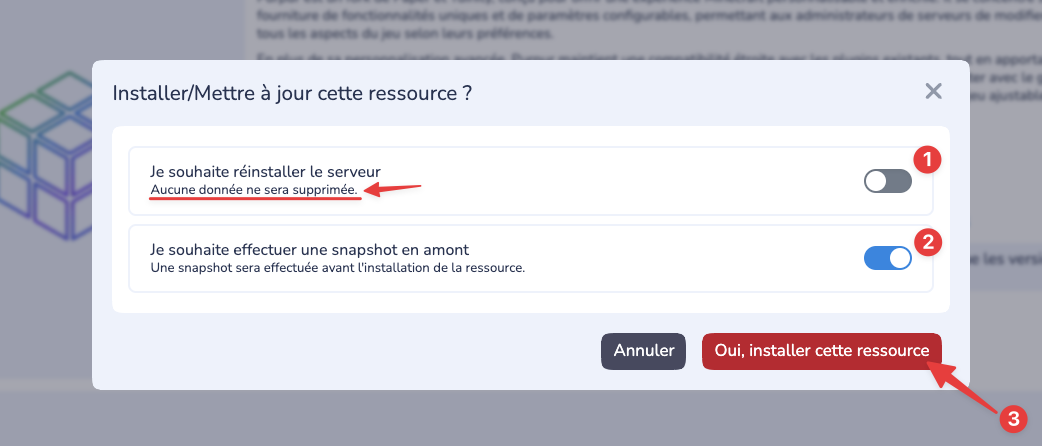
- A popup will appear, it is imperative to verify that the button to reinstall the server is not checked. It is also advisable to create a server snapshot. Then simply click on the "Yes, install this resource" button and let the installation process run its course.
Warning: If you switch from an optimized version (like Paper or Purpur) to a Vanilla version (the base game version), or vice versa, your world's folder structure may change. If you notice a loss of progress in the Nether or the End, consult our troubleshooting section just below!
Step 3: Restart and verify your server
Once the installation is complete, all that's left is to restart the machine! The first startup after an update may take a little longer, as the server needs to convert world data to adapt to the new version.
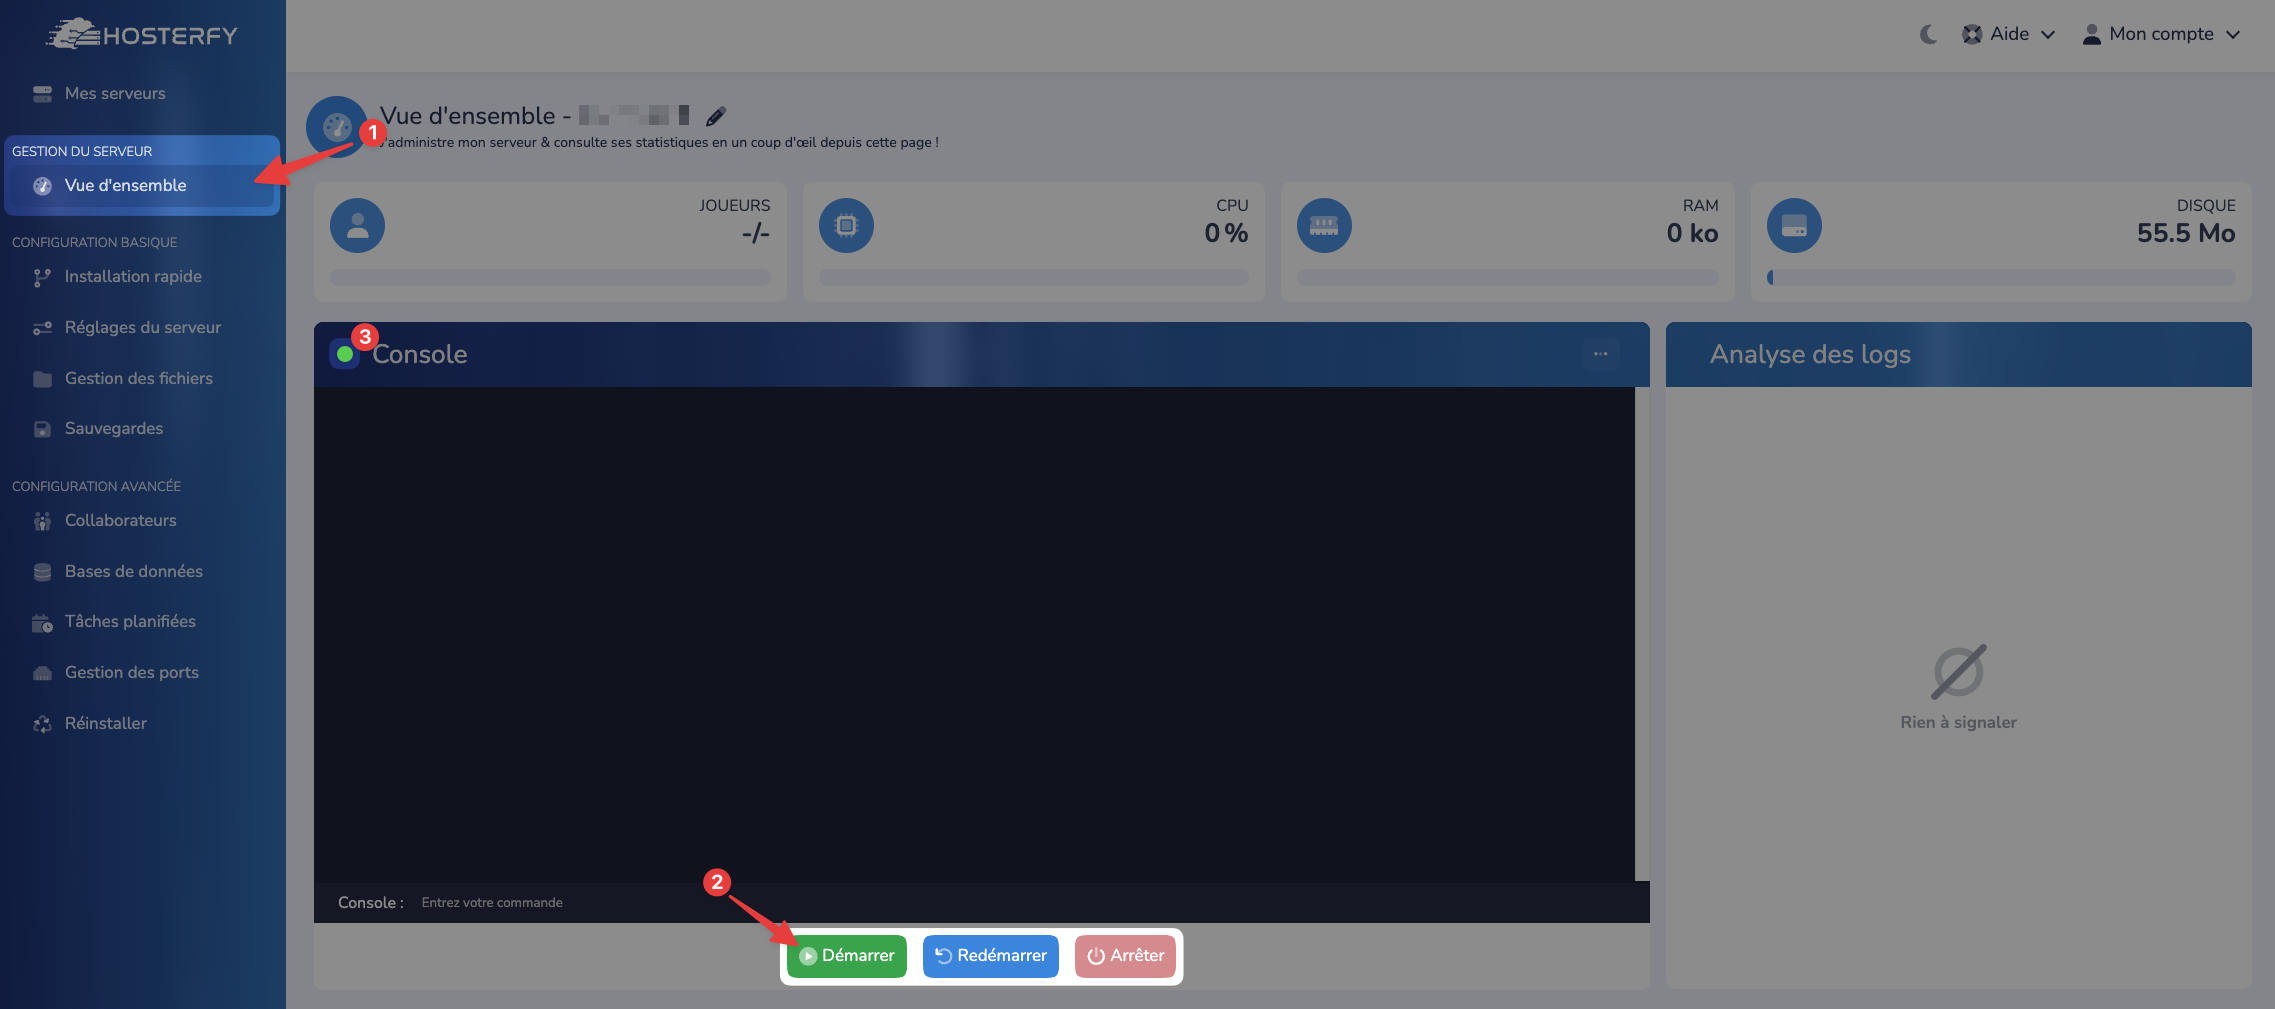
- Return to your server's main management page ("Overview").
- Click on the green "Start" button.
- Keep an eye on the console that appears. It will show you the startup process live and indicate if everything is going well.
Pro Tip: The console is your best friend. If the server doesn't start, that's where you'll find the error messages indicating the source of the problem.
Troubleshooting & Common Issues
My progress in the Nether and the End disappeared after the update!
This problem often occurs when changing server types (from Vanilla to Paper/Spigot or vice versa). The reason is that dimension folders are not stored in the same location.
- Vanilla stores dimensions like this:
world,world_nether,world_the_end. - Paper/Spigot stores them in the main folder:
world/DIM-1(for the Nether) andworld/DIM1(for the End). To fix this, you will need to use SFTP access (via a client like FileZilla or WinSCP) to manually move folders from the old structure to the new one. Remember to shut down your server before any file manipulation.
My server no longer starts and displays an error in the console.
Check that your plugins and mods (if you use them) are compatible with the new Minecraft version. A major update often breaks the compatibility of old plugins. To learn more, consult our guides on how to install plugins or how to add mods to a Minecraft server. Disable them and try to start the server again.


Post a comment
Comments